A Rain Garden’s Adventure – UPDATE
… from concept to the future
The Problem – our back yard floods when we get large, sustained rains.
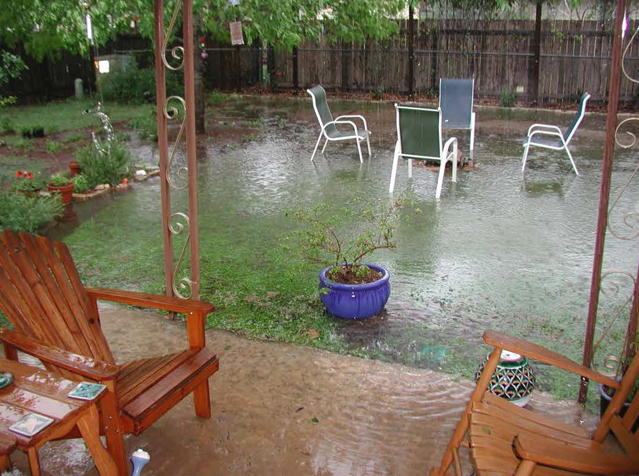
Drainage from the lot across our back fence pools in our back yard because our house blocks drainage from our back yard toward the street. To blunt the breadth of this ponding, particularly for it to lap up on the back patio, we decided to install a rain garden, that will pond and infiltrate a lot of the flow within it, instead of it spreading over the yard.

The logical location for that rain garden is, of course, the low point, where ponding first appears. So that set the location, in the area in the picture above that is ponded.
What is a rain garden?
Informally, a “rain garden” is any vegetated low spot where runoff gathers and infiltrates into the ground. So in that sense, much of our back yard is a rain garden. As a formal term of art, a rain garden is a bioretention bed. That stormwater management tool is an excavation that is filled with an “engineered” media into which plants are installed. Water gathers in the excavation, filling the pores in that media and ponding up over it, to the overflow depth of the bed. Below is a generalized schematic of a bioretention bed.

Of course, since water ponds here instead of running off in any case, in terms of hydrology installing a formal rain garden – a bioretention bed – in this yard is rather gratuitous. But as noted, the aim was to have more of the water pond in the rain garden excavation, with less spreading across the yard and onto the patio. And also, as I am an avid advocate of Low-Impact Development – for which the bioretention bed is a prime tool – to also create an example that practices what I preach.
Creating Our Rain Garden
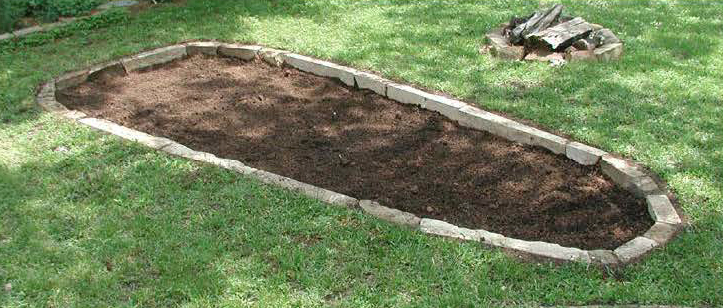
Having determined the best location, the low spot where ponding in the back yard begins, I cut the edge and removed the turf. This created an excavation about 4 inches deep, which I then lined with 4-inch cut stone blocks.

The next step was to dig out the rain garden excavation which would be filled with the engineered media. I decided a media depth of about 8 inches would be a good compromise between providing storage volume, limiting the depth plant roots would have to extend to get into the native soil, and “preserving” my back. I wheelbarrowed all the excavated material, including the turf dug off the top, out to the front yard, where I had long planned on installing a raised bed. Below we see the excavation, ready to have the media installed. Note the tree roots I cut out when digging out the bed. I laid those in the bottom of the excavation before installing the media, to create a sort of hugel culture bed for the rain garden plants.

I decided on a media obtained from a local yard named JV Dirt, a specialty mix they created that includes expanded shale in the mix. This increases the water holding capacity of the media. Since the media must be coarse/sandy so that water will readily infiltrate into it when runoff starts to gather in the bed, the ability of the media to hold water in the plant root zone over the media depth will be limited. The expanded shale “absorbs” water, which it then releases as the soil around it dries out, so that more water would be available to the plants through extended periods of no rain.
It took two runs in our pickup truck to get the media here. We wheelbarrowed the media into the back yard, dumped it into the rain garden excavation, and leveled it out. The finished product is seen below:

I decided to add some compost and mix it into the media, to provide a “better” planting bed, that would support the plants better than the “bare” media, which contains limited organics and nutrients. This is by design, actually, because often a bioretention bed is installed with an underdrain and acts as a biofilter, so that “excess” nutrients in the media may flow out of the bed, a sort of “compost tea”. As those biofiltration beds are installed to treat the runoff to protect water quality, regulations for those installations limit the nutrient content of the media. In our case, though, the water infiltrates into a deep soil in a “non-sensitive” watershed, so leaching of nutrients from the media here is not an environmental hazard. And besides, this is a rain garden installed “outside” of the regulatory system, so adding compost to our media was “okay” in that sense too. The bed with the compost mixed in, ready for planting, is shown below:
The next step was to decide what plants to install. We wanted the bed to be an attractive landscape amenity, so we chose a variety of plants that would provide various colors and plant shapes. We also chose plants that were going to be available at the Wildflower Center’s spring plant sale. I consulted lists of plants recommended for rain gardens put out by the Wildflower Center, Texas A&M, and the City of Austin, and came up with this planting plan:
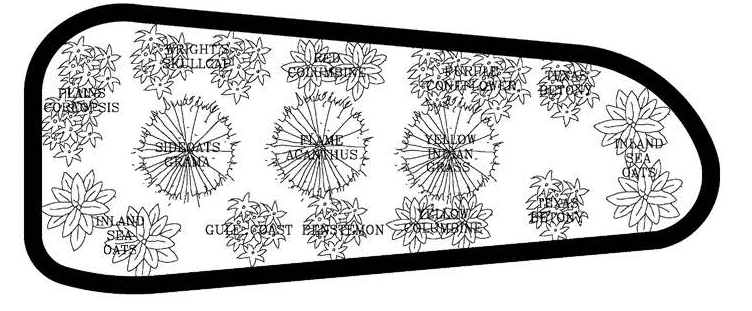
The general plan is to have a ring of smaller plants around the edge and some central plants that would grow taller and spread out some. I was told by an expert landscaper friend that the flame acanthus would “overwhelm” a space this small, but I decided to give it a try anyway.
So when the Wildflower Sale came along, we got the plants. I wanted to install all 1-gallon plants so that they’d have a more well-developed root system, but had to settle for 4-inch plants for the red columbine and the plains coreopsis.
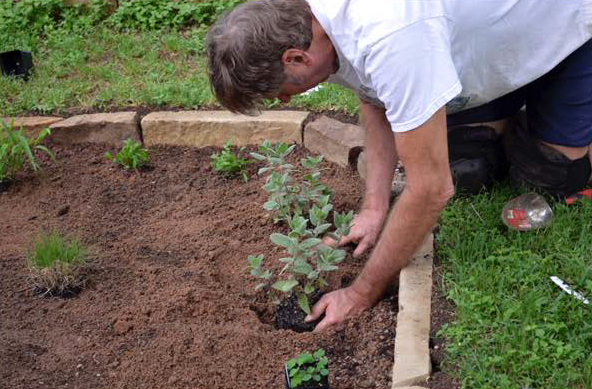
The planting begins:

Here we see me – and our cat Joey – at the “Bon Jovi point” (“Oh, we’re halfway there …” 😉

And finally I get to the last plant – yea!!
I then covered the surface of the media with a thin layer of mulch, to both hold down “weed” growth and to blunt drying out of the media over extended periods with no rain.
With that, the rain garden is finished!! And I cracked open a Real Ale Fireman’s 4.
Into Operation
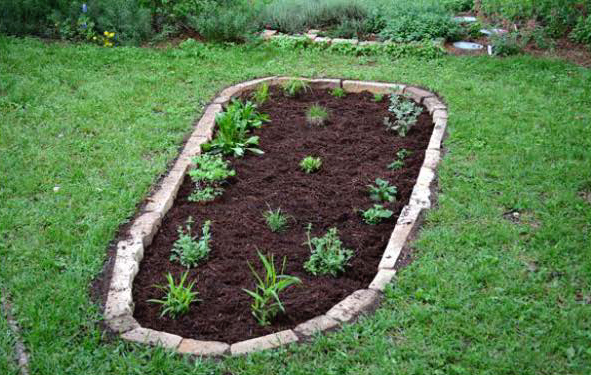
Lacking rain, I spot watered each plant every other day or so to get them established. Particularly important with the coarse/sandy media all around the plants. Below we see the bed about a week after planting. All plants are doing well.
It was a few weeks before we got a “significant” rainfall. When we finally did, we saw the rain garden begin to pond – with no ponding over the rest of the yard. It works!!

A few days later, we got a big enough rain that the bed completely filled up to the top of the rock border. As we see below, again with minimal ponding outside the bed.

This was the beginning of a series of larger rainstorms through May and June, including the big Memorial Day floods. So the system was really put to a test.
When we got a much larger rainstorm, there was still some ponding over the yard outside the bed too, as we see below, but clearly more of the water was contained within the rain garden.

And each time the rain garden filled up, it would drain down in less than a day, so the plants were not standing in water for too long. Here we see the rain garden in “mid-drain”:

Then we got a week of intermittently heavy rainfalls. The rain garden filled up and the ponding spread over the yard 3 times that week:

And then the rain garden filled up a 4th time. With the ground so saturated, the rain garden drained more slowly this time. All told, this spate of rainy weather resulted in the plants being in standing water for several days. The “too small” red columbines got completely covered – for too long – and they were clearly “toast”. The Texas betony also failed to keep stems above water after a few days of ponding.

In the picture below, we see the impacts on the plants of having been in standing water for several days. Being young plants, not having developed significant growth and an extensive root structure, they were perhaps not “prepared” for that. Or it could be that some of these plants are simply not really very good choices for a rain garden.

One of the purple coneflowers appears to be dying, and the yellow columbine and flame acanthus appear to be struggling mightily. The bunch grasses appear to have survived, the skullcaps look a bit worse for wear but are still standing tall, one of the coreopsis has lodged, the other looks fine. The gulf coast penstemon and – especially – the inland sea oats seem not to have been bothered at all.
Below is a more closeup view of the flame acanthus, yellow columbine, purple coneflower and the now “toasted” red columbine. And just at the edge of the view, the now “flattened” Texas betony. The flame acanthus appears highly compromised, but the two bunch grasses appeared be surviving, for the present.

The rains were relentless, however, and the bed flooded and flooded again. As noted, with the soil – not only below the bed but all around it – so saturated, the bed was draining more slowly, leaving the plants in ponded water for days on end. One by one, the plants began to fail. Until only the inland sea oats and the gulf coast penstemon survived. I’m guessing the bunch grasses would have made it if they had been big enough to have foliage above the water, but they weren’t, and so they succumbed. Leaving us with a very impoverished plant palette in a mostly bare rain garden bed. We filled it in with potted plants, “to keep up appearances” 😉

It was a case of very bad timing, of a spate of heavy rains before the plants could become well established. Still, as we saw, the rain garden basically “worked” as it was expected to, containing the runoff up to the point that it was overwhelmed, and infiltrating it into the soil, holding water on the site and bolstering deep soil moisture.
Then the spigot shut off, and we did not get any rain for about 2 months. Note all the leaf fall at the end of August, showing how drought-stressed the trees are. And still the inland sea oats and gulf coast penstemon hung on. So we know those, at least, are very robust rain garden plants.

We’ll put in more plants in the fall when the temperatures moderate, about the time of the Wildflower Center fall plant sale. We’ll keep on watching and tracking the plants, and updating this document. Please follow along with us and watch to see what the future holds for this rain garden. Which plants will survive, and thrive? Which will have to be replaced? How will it look, and perform, over time?
On to the future …
UPDATE
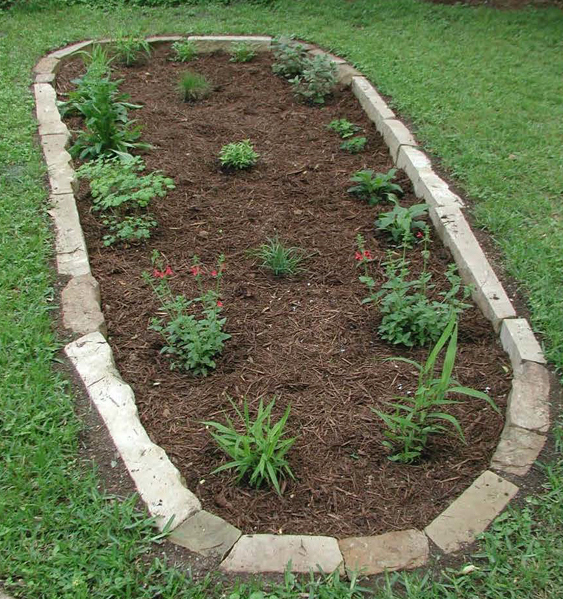
The fall Wildflower Sale is here, so yesterday we got more plants for the rain garden and planted them. The rain garden now looks like this:

The added plants include more inland sea oats and another gulf coast penstemon – the survivors from the original planting – and switchgrass, yellow Indian grass, American beautyberry and Turk’s cap. If the promised El Nino ever brings us any rain, we’ll watch and see how these do.
When installing these new plants, I encountered a very “hard” media, needed to use my geology pick to create the plant holes. I attribute this to the rain garden media being “settled” by the repeated and prolonged ponding in May and June, then being “baked” for a couple months with no rain. I will observe how readily the water infiltrates – if we ever get any big rains that fill it up – to see if the media may need to be “aerated” to restore its permeability. That may be a maintenance program that needs to be considered for rain gardens in this climate. We’ll see.
Continuing to watch …
Explore posts in the same categories: Uncategorized

January 30, 2019 at 5:46 pm
[…] then I ran across Water Blogue’s A Rain Garden’s Adventure and Midwest Permaculture’s, Front yard Rain Garden and Berm and found myself incredibly […]